Nagios Core

Nagios is an open source software light-weight designed to monitor system, networks and infrastructure, its light weight allow us to install it in a raspberry.
There are several version but in this tutorial we go for the Nagios Core
1. Prepare Raspberry
- Update the system.
2. Download and compiling Nagios
1. Move to a temporal directory /tmp were wi later will download the Nagios source code.
2. Download the Nagios source code
I had an issue with SSL those i download it normally and i move it to the directory manually
3. Extract the files
4. Move to the directory and prepare for compilation
5. Compile Nagios
3. Settings up Nagios on the Raspberry
1. Create users and groups with the make command
2. Installed the binaries to the system using the command bellow
3. With the make command we install the Nagios service and make it start at boot
this command install the Nagios core deamon
4. we set up the external command directory
5. Copy a sample configuration file using make
this file is important without it the software wont run
6. now configure the apache server or to install the configuration for the apache
7. Now we create an apache user that we will use to access the Nagios interface
The following command will create a user called nagiosadmin. You will be asked to specify a password for this user.
4. Starting Nagios on Raspberry
1. Restart the Apache server
2. Enable NAgios service and start it up by running the following two commands
By enabling the service, we will be allowing Nagios to start up at boot on your Raspberry Pi.3. Verify that Nagios has started on your Raspberry Pi by running the following command.
If everything is working as intended, you should see the following text be outputted to the terminal.
This text tells us that the service is active and is currently running.
5. Installing the Nagios Plug-ins
In this section, we will be showing you how to install these Nagios plugins on your Raspberry Pi.
1. First change into our /tmp directory.
2. Now that we are in the /tmp directory, we can download the Nagios plugins by running the command below.
3. Now extract the plugin source code to our current directory by using the following command.
4. Our next step is to change into our newly created directory and configure the plugins for compilation.
4. Once the configuration process has completed, we can compile the Nagios plugins by running the following command.
5. Finish up this process by installing the Nagios plugins by running the following command.
6. To make sure Nagios loads in the new plugins, restart the software by running the command below.
6. Connecting the Nagios Web interface
We can access the UI by
7. Adding Devices to Nagios
To add host we will need to create a configuration file that later Nagios will read.
1. Navigate to object configuration folder for Nagios
this is a default folder that contain sample configuration files we can check the file to get an idea
2. Now lets create a configuration file
We can use a name pimylifeuphost.cfg
3. within the file we can enter the following
to save
ctrl+xfollow byyand enter
4. We need to modify the Nagios file to be able to read the new host
5. within the file we need to do changes
Find
add Bellow
Restart Nagios
8. Adding Service to Nagios
This example we will add check_http and Check_ssh
1. We need to modify the host configuration created earlier
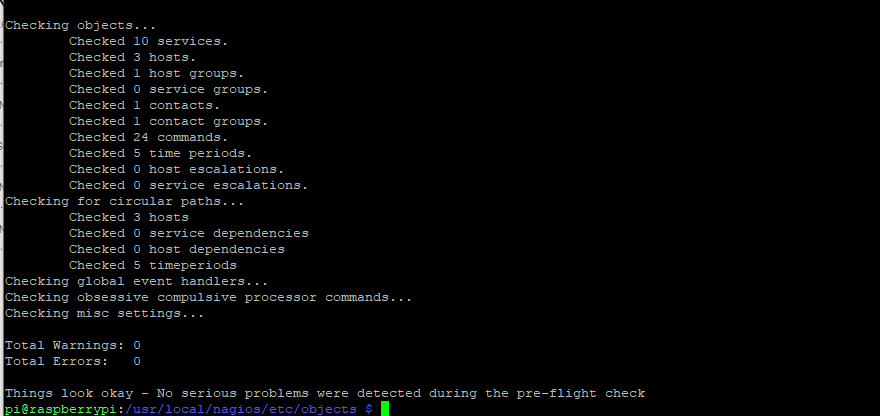
2. We need to check if the configuration made is correct
If everything is okay we will see Things look okay
Now we restart Nagios